 happy monday everyone! did you have a good weekend filled with sewing, knitting & crochet? you ready for some more inspiration and projects galore? yippee! today we're welcoming meg from one of my faaaavvvve blogs to stalk - elsiemarley!!!! oh my...i've been trying to write this intro to explain my thoughts on elsiemarley but i've realized there is no better way to explain this wonderful, simplistic, inspirational, delightful and oh so addicting blog other than go check it out.
meg's projects seem effortless, they are so organic and i find myself so drawn to her work, thoughts and her blog. whenever i find myself needing to find a boost of good ol creative energy i pop on over to elsiemarley. this pastry chef is now making the most delectable crafts & sewn goodies instead of chocolate's and boy am i happy she is. just like chocolate meg lures you in and then once you take your first bite it's instant luv! this girl's got an eye and some fab taste and i am so excited, thrilled and honored to have her be a part of comfy sews vs cozy knits.


i tell you....blogging is just so much fun and then when you blog and get to have bloggers you are amazed by on a weekly basis come post on your own blog...well.....it's just fab and one of the many reasons why i love what i do! versus is like christmas in the spring for me!

so get ready to open up another pressie! here's meg with another awesome project for us all...
Hello Mommyhood readers, Meg from elsiemarley here! I was absolutely thrilled when Shannon asked me to be a part of her fabulous crafty boxing match. It was a little hard to pick teams, I have to say. I learned how to crochet last year and very quickly fell in love with it. My winter was spent sitting on the couch, cranking out whatever cool crochet patterns my little fingers desired, as my poor sewing machine sat dusty and unloved in the corner. But sewing has always been my true favorite: the instant gratification of sewing wins out over the sitting on your butt part of crochet (or knitting) almost every time. And with that in mind, let's crank out a bag that will go with everything in a few measly hours. Take that Cozy Knits! Kapow!
Every spring I get the urge to buy a completely new, bright, flirty, floral wardrobe replete with matching bags and strappy sandals, but it never happens. Even if I did have the cash for a springtime shopping spree (ha!) all those accessories wouldn't fit in our little house. So I came up with a bag that can be many different bags all in one. It is completely reversible, so it will match all the springy outfits you already have and make them look fresh and new. It is also adjustable, so it can be a very ladylike shoulder bag or if you need to jump on your bike and go, it can become more of a messenger bag. Awesome, right? So without further ado, I give you The Awesome Bag:

materials
- 1/2 yard fabric A
- 1/2 yard fabric B
- 1/2 yard lining fabric, I prefer to use canvas or a home dec weight fabric rather than interfacing
- 20 buttons, yes 20! all the same, or 10 of one kind 10 of another, but they all should be about the same size
- sewing machine, buttonhole attachment (you can do it!)
- iron
1. Out of each 1/2 yard of fabric cut two 14 inch wide by 15 inch tall pieces and one 2 inch wide by 41 inch long piece. You should have plenty of fabric to work with, but I want you to mark all the piece on your fabric first to see how it will fit. The strap will go along the top (the long side will be perpendicular to the salvage) and the two main piece of the bag should fit below it (the short side going with the salvage).
2. On the bottom of each piece cut a 1 1/4 inch square out of both corners. This is going to make a boxed bottom for the bag.
3. Now you need to sew all the pieces together.
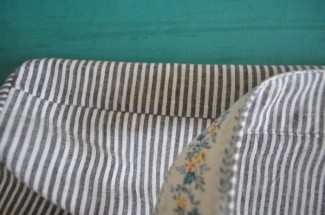
- Start with fabric A: before you sew, mark a 4 inch wide space in the middle of the bottom edge, sew the bottom of the bag together, right sides facing, but in between the marks use a basting stitch (just a very long stitch). Take it to your ironing board and press the seam open. Then sew up both sides,right side facing. Don't sew around the notches we cut out! the easiest way to press the side seams open is to lay your bag flat and fold down one side of the seam, iron it (see above), then flip it over and fold the other side of the seam down and iron.
- fabric B and lining: Sew the bottom seam first (no basting) right sides together and press the seam open. Sew the side seams and iron as above. Again don't sew the notches!
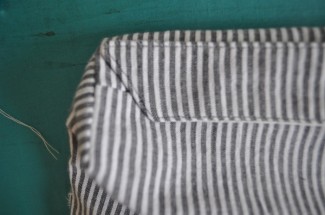
4. At on of the square notches, fold the bag so that the bottom seam and the side seam line up. Iron it flat and sew closed. Do this on both notches for fabric A, fabric B, and the lining.
5. Take fabric A where we did that bit of basting and rip out all those basting stitches. This will be the hole where we turn the bag right side out, which is the next step...
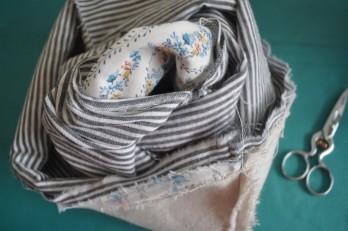
6. Turn the fabric A bag right side out and put it on your hand (really!). Then take the fabric B bag, inside out, and pull it on top of fabric A. It's important that that the right side of these two bags are facing each other. Then lastly, fit the lining (inside out or right side out, it doesn't matter) on top. You should have a big oven mitt like thing on your hand now. Poke your fingers into the boxy corners and try to get them all to match up.
7. Line up the raw edges at the top of the bag. If all the fabrics don't line up (mine never do) trim them so they do. Now sew all around the top of the bag.

8. Stick your hand through the hole we made in fabric A and pull out fabric B and the lining. Then stuff fabric B and the lining into fabric A. This is a little confusing to explain and weird the first time you do it, but it works I promise!
9. Iron the top edge.
10. Hand sew the hole in fabric B closed. It should be easy to make it straight and pretty much invisible because you can just follow where the basting stitches were. The best stitch to use for this is the ladder stitch.
11. Now for the strap. You should have three strap pieces--42inch by 2inches--one from each fabric. Stack them all on top on one another making sure the right sides of fabric A and fabric B are touching.
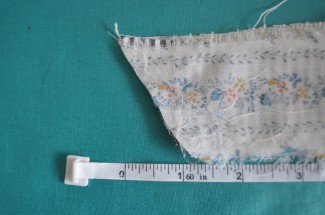
12. Lay the strap out flat. On the left side, on the bottom measure in one inch and cut from there to the end of the top edge. This just makes a pretty angled end to the strap. Do the right side, except measure in one inch from top and cut down to the end of the bottom edge.
13. Sew all around the strap, leaving about a foot wide opening in the middle of one side, so we can turn it out easily. You could also do the basting stitch trick here if you like. Turn that sucker out! You can use a chopstick, a pencil, a tweezers, whatever works, but be sure to poke the corners at the ends of the strap out. Iron it well after it's all right side out.
14. To sew the opening closed you can topstitch all around or hand sew it--it's up to you. If you want to topstitch it and want to match your thread to your fabrics, just put the one that matches fabric B in the bobbin and the one that matches fabric A on top. Then be sure to sew with fabric A side on top and you're good to go.
15. Now we're going to attach the strap to the bag! Place the strap so the pointed part is at the bottom edge and it is centered over the side seam.
16. Starting about an inch from the top of the bag lay 5 buttons along the strap all the way to the bottom (about an inch before the angled bit begins). My buttons are 1 1/2 apart, but your bag might have turned out a little bigger or smaller, so just make sure they are evenly spaced.
17. Mark where all the buttons go. Then do a test run with your buttonhole attachment on your sewing machine.
18. You can see above I have my test buttonhole next to my strap (with the mark on it), so I know about where to start the buttonhole. When you hold your awesome bag all full up with awesome stuff the button will slide down to the bottom of the buttonhole, so keep this in mind for where you place the buttonhole in relation to the button. I hope this isn't horribly confusing--I'm trying to be extra clear so you don't have to rip out any buttonholes, because that's no fun.
19. Mark the buttonholes in the same way on the other side of the strap as well. Sew those buttonholes! You should have 5 on one end and 5 on the other. Carefully cut the buttonholes open. Pin the strap onto the bag and make marks through the buttonhole for where the buttons go. All the marks should all be on the side seam.
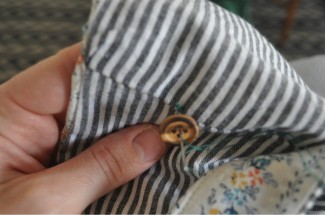
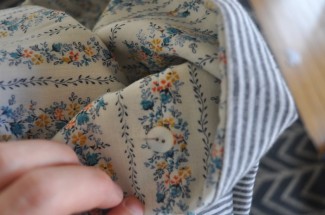
20. It's time to sew all those buttons on. Settle in on the couch with a needle and thread (and a podcast or two). You are going to sew two buttons at a time: they will be in the same place, but one will be on one side and one on the other. The awesome bag is reversible, remember? When you are finished you should have 20 buttons sewn on!
21. Attach your strap however you like, on whichever side goes with the very cute outfit you have on today. Ta Da! you made The Awesome Bag. You are awesome!
you can find more elsiemarley here: blog, etsy shop, twitter, pinterest and ravelry! what fabric would you use to make the awesome bag? have fun & happy sewing!







What an excellent spin on reversible bag handles! I just may have to snag this idea for myself. I may end up playing around with varied decorative buttons (I like eclectic, non-matching stuff) especially if one side of the bag is made with a simple fabric. Oh... the ideas are forming!
ReplyDeleteThis bag IS awesome!! It's perfect for traveling with kids. I often want to switch from cross body to shoulder while out, but the bags are not always comfy both ways. Off to etsy button shop!
ReplyDeleteLove it!!! Oh this is on my wish list:):):) it's amazingly perfect for throwing in all sorts of kid and baby stuff!!!! Bah 3 kids worth!!! ;)
ReplyDeleteShannon I love the colors on Versus! This site is so pleasing to my eyes! I love it:) amazing work my friend!!!;)
this is beautiful! love the versatility!
ReplyDeleteohhh - that is an awesome bag! Thank you so much for sharing!
ReplyDeleteHaving seen it in person this morning, I'm totally in love. Adding to the top of my list of things to make - thanks for makin' a tutorial for us!
ReplyDeleteI'm about two-thirds of the way through the bag now and it's looking great. I've ventured into making fabric-covered buttons for the sides so now I just gotta get these kids in bed so I can finish it! Thanks for the tutorial, Meg. I'm new to your blog and am loving it so far! Where can I post a picture of the finished bag (assuming I don't screw up all those buttonholes!!)?
ReplyDelete@Laura FisherI'm a new addict to fabric covered buttons! LOVE them!!!! I'm not sure if Meg has a flickr group. I'll check. Otherwise you can always add it to luvinthemommyhood's flickr group. I love seeing what you guys are all making :)Here's the link:
ReplyDeletehttp://www.flickr.com/groups/luvinthemommyhood/
@Laura Fisher
ReplyDeleteLaura,
I do have a flickr group: elsiemarley
I'm so glad you are using covered buttons! I thought they would look nice with the bag, but didn't want to add another step :) Can't wait to see your bag!
Hi! Thanks for the tutorial. I've finished my bag too, I love it! you can see it here
ReplyDeletehttp://cookbookaddict.blogspot.com/2011/04/craft-post.html
I'll try to upload a pic to flickr
gotta learn this button hole thing, this bag is a must!
ReplyDeleteI'm thinking of making this bag in home dec weight canvas. Do you think I'd still need a lining fabric? Thanks so much for the tutorial!!
ReplyDelete2 pictures cannot be displayed (step 5). Can you do something about it?
ReplyDelete@AnonymousAs far as I know there aren't pictures for those steps. You can always email Meg from Elsie Marley (the blog link) is at the top of the post and ask her if she has any pics she could send your way :)
ReplyDeleteHave fun sewing!
Hi,
ReplyDeleteJust wanted to let you know I've linked to this project on our site, AllFreeSewing.com. I think it's a great project our reader will love to make. Here's the link:
http://www.allfreesewing.com/Bags-and-Purses/The-Awesome-Bag
If you have any questions or would like to see more of your projects on the site, please feel free to contact me
Thanks!
Kirsten
Editor
AllFreeSewing.com
This is a great pattern, I am seeing many colours, patterns, materials in my sewing future! Thanks so much for sharing your tutorial. May I make one little correction without causing any major upheaval? The word for the edge of the fabric that is finished is "selvedge", not salvage. Again, thank you for this pattern!
ReplyDeleteHi there, just wanted to say I love your blog. I made the awesome bag and it turned out...awesome! It took a bit of time, but I think it's totally worth it. Can't wait to show my colleagues : )
ReplyDeleteI have a question, for anyone who can answer... what is lining fabric? how is it any different than normal fabric?
ReplyDeleteIt's basically the same thing. We just call it that so you can differentiate what part of the pattern piece you are using. sometimes people do use different types of fabric for their lining than their outer/main fabrics. These will usually be listed in the tutorial and/or pattern you are following so you know what types of fabric will work best.
DeleteHope that helps :)
Love this pattern, I've been making bags for 10 years, this is one of the best ideas I have seen in a long time.
ReplyDeleteI am new to sewing. Would someone be kind enough to suggest how to lengthen(and also shorten) the straps? I am a bigger girl and would love to make a cross body bag like this. My daughter is quite short and petite and would need it a bit shorter.
ReplyDeleteIt is such a cute and versatile style.
Thanks!!
Make the length of the strap longer or shorter by adding or subtracting inches to/from the stated 42 inches. For instance, measure from where you want the bottom button to hit you and measure from the top of the bag (where you would put the top button) across your body to the top of your shoulder, add 2 inches and double that amount. Say I measure from the top button to the top of my shoulder and it measures 22 inches. Add 2 inches to make it 24 and double, so my total strap length would be 48 inches to accommodate the angled end and space between it and the bottom button hole. You can measure your daughter the same way and get a shorter strap that would fit her better! Hope that helps! :)
DeleteWhen I first saw this on Pinterest, I thought it was made from men's button downs...cute bag!
ReplyDeleteHello - I came across your blog after finding an image of one of your bags on Pinterest while I was searching for some fresh ideas for my handbag website - I am glad I found your blog, you do great work.( I don't sew a lot these days but I may just give this bag a try :) )
ReplyDeletefound the image of your bag here http://pinterest.com/chelmsford/handbags/
This is a neat bag. I want to try to make one with a longer strap to make it a cross body bag. I think big snaps would be a neat way to do the strap instead of buttons.
ReplyDeleteI believe the word interlining should be used instead of lining.A lining shows.Interlining is hidden.
ReplyDeleteThis is a great tote! And I discovered something really neat about adjusting the length of the strap without changing the measurements - just move it up on the buttons. It still looks great even if some buttons aren't attached to the strap. (They will be on the bottom of the row.)
ReplyDeleteJust finished! Super easy and cute! 15 minutes playing with the button hole settings and I was good to go! Thanks for the tutorial!!
ReplyDeleteCute bag!!
ReplyDelete